How to Find & View the Files Installed by a Chrome Extension
Lawrence Abrams
- January 14, 2019
- Read 323,381 times
Whether it be because you suspect a Chrome extension is malicious, you want to create a backup of a favorite and discontinued extension, or you just want to see how the extension works, knowing how to find and view the files installed by a Chrome extension can be useful.
In this tutorial we are going to provide two methods that you can use to view the files associated with a Chrome extension. The first method is to view the actual files installed on your computer, which is useful if an extension is no longer available on the Chrome Web Store or the store has a different version than the one installed on your computer.
The second method is to use an extension called Chrome extension source viewer that makes it very easy to view the source code of an extension directly from the Chrome Web Store.
View the files belonging to an installed Chrome extension
When extensions are installed into Chrome they are extracted into the C:\Users\[login_name]\AppData\Local\Google\Chrome\User Data\Default\Extensions folder. Each extension will be stored in its own folder named after the ID of the extension.
For example, below is the folder that contains the currently installed Chrome extensions, with each subfolder corresponding to an installed extension.
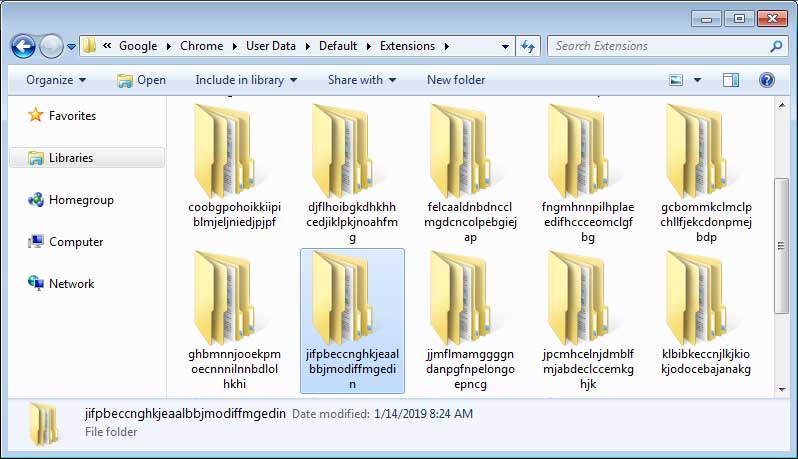
To view the contents of an extension, first find its ID, and then open the corresponding folder. When you open the folder you will be shown all the images, html, JavaScript files used by the extension.
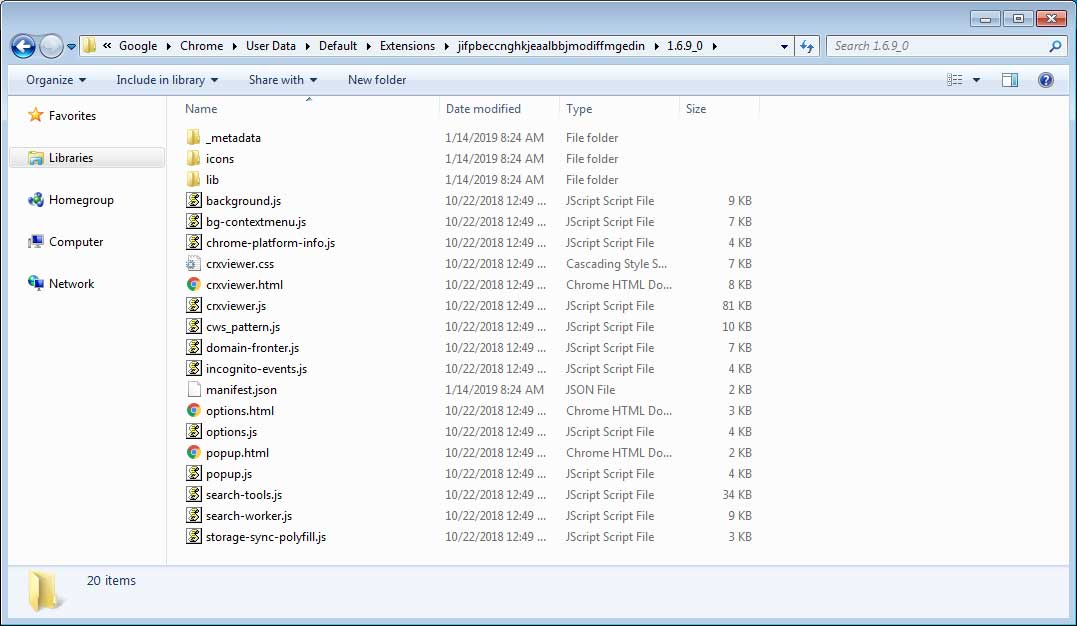
To view the source code of a particular, simply right-click on it and select Open with and open it with the Notepad application. For JS, HTML, and JSON files, you will now be able to see the source code directly in Notepad.
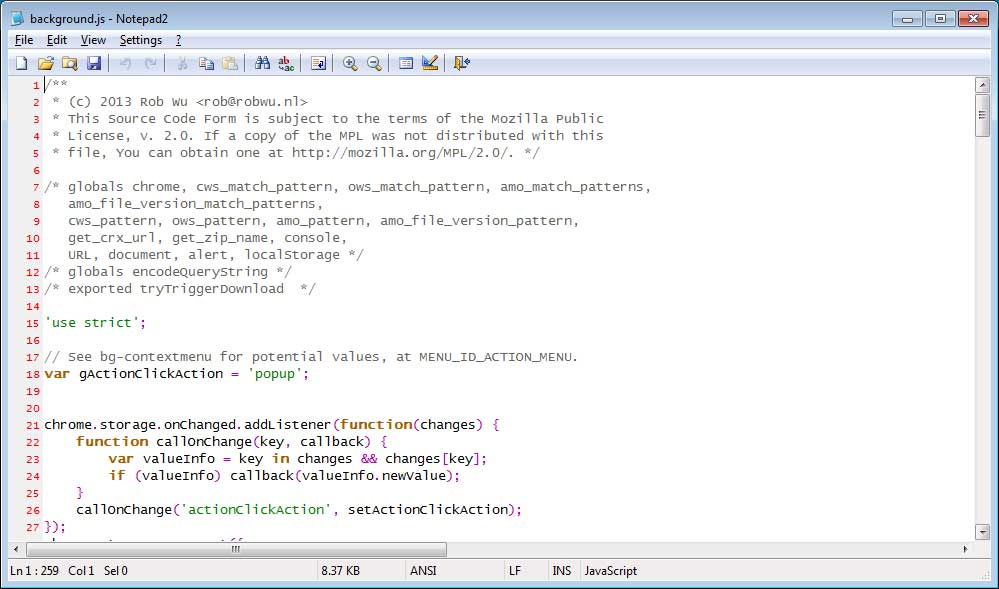
If you wish to backup the folder that contains the installed extension, just zip the folder named after the extensions ID in the C:\Users\[login_name]\AppData\Local\Google\Chrome\User Data\Default\Extensions folder.
View source code of extension on Chrome Web Store
If you would like to view the source code of an extension before you install it, then there is a great extension that allows you to do so. The Chrome extension source viewer is an extension that allows you to view the source code of any extension that is available from the Chrome Web Store.
Once you install the extension, you will be given a new a right-click context menu option titled "View extension source".
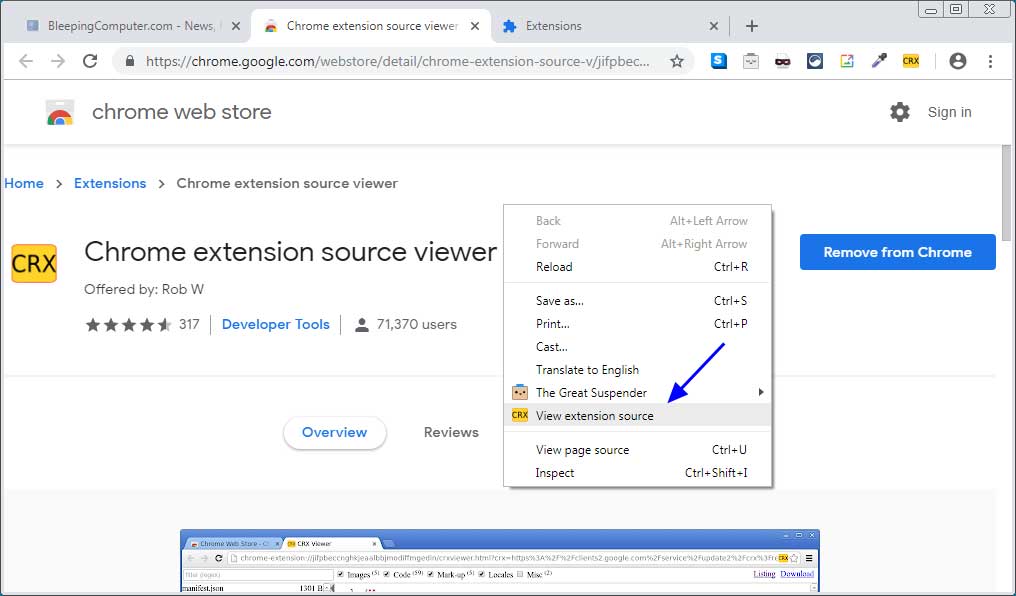
Clicking on this menu option, will open the zip file containing the extension and display the contents of the archive as shown below. From this interface you can click on the various files to see their contents.
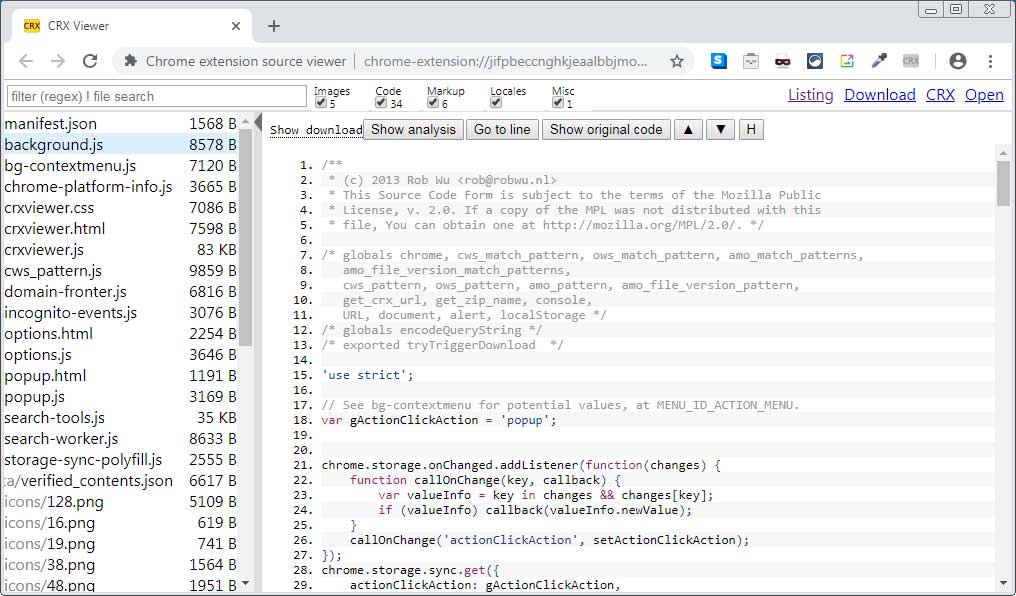
When done viewing the contents, you can close the windows.
This extension also allows you to download the corresponding Zip file for the extension from the Chrome Web Store by clicking on the Download button. This is particularly useful when you want to make an archive of the current version of the extension being offered by the Chrome Web Store.


