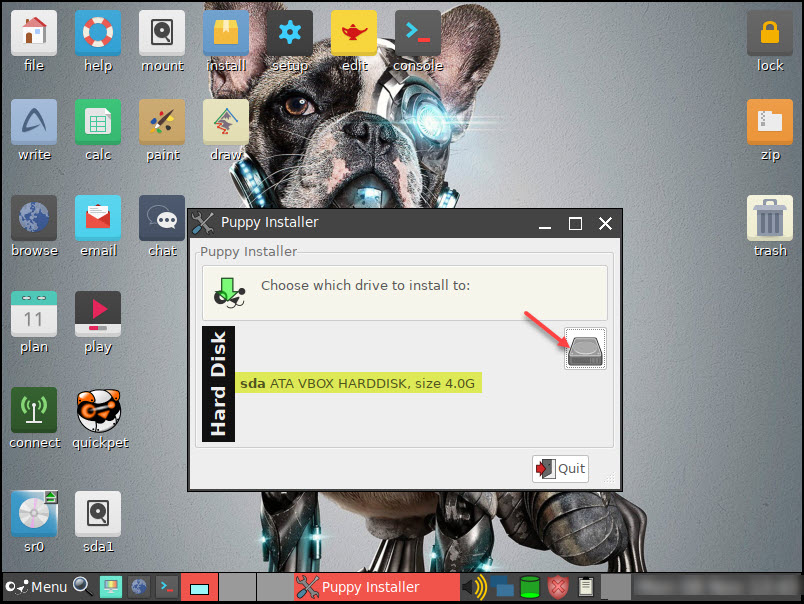
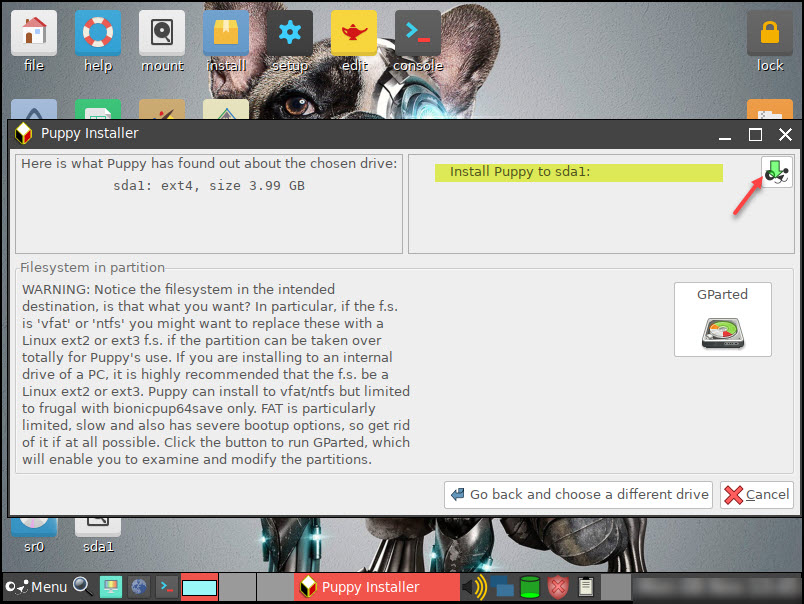
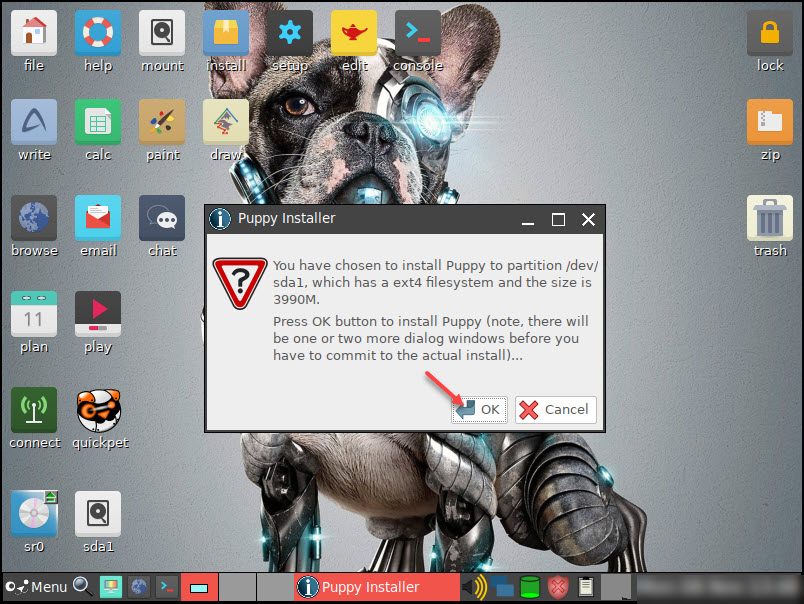
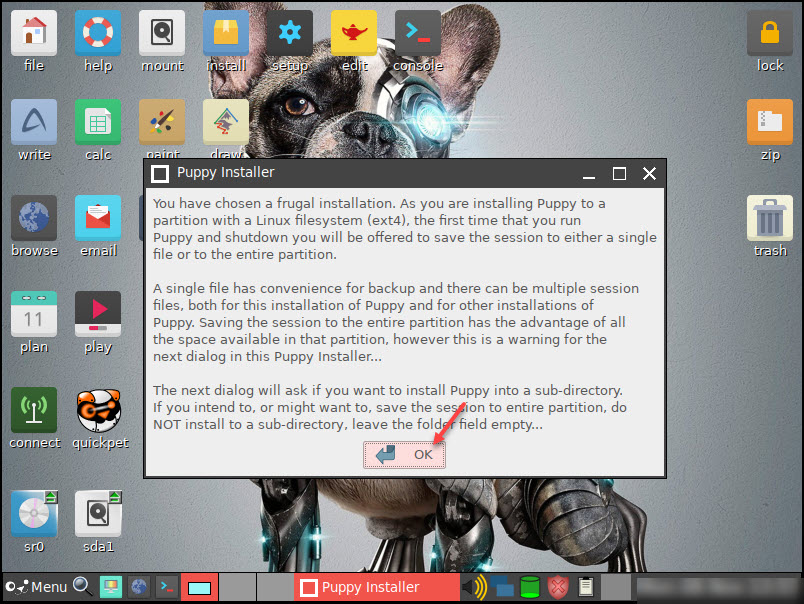
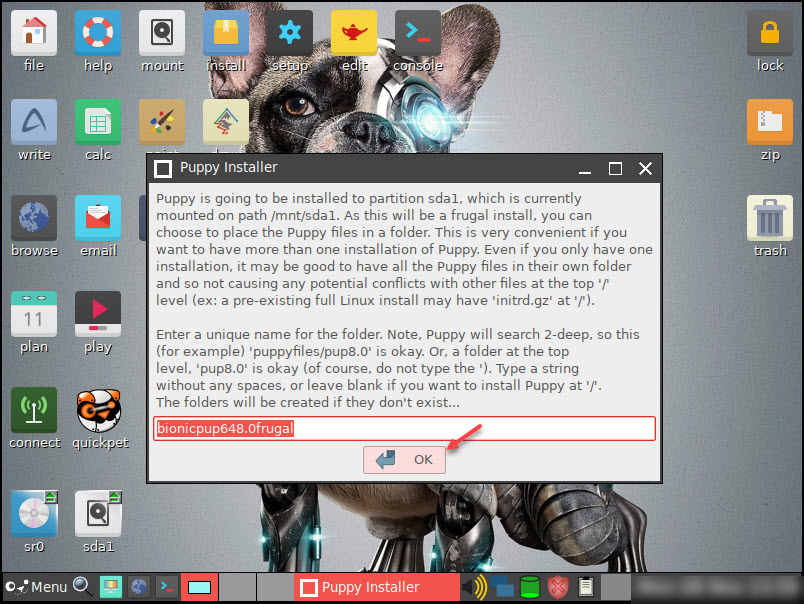
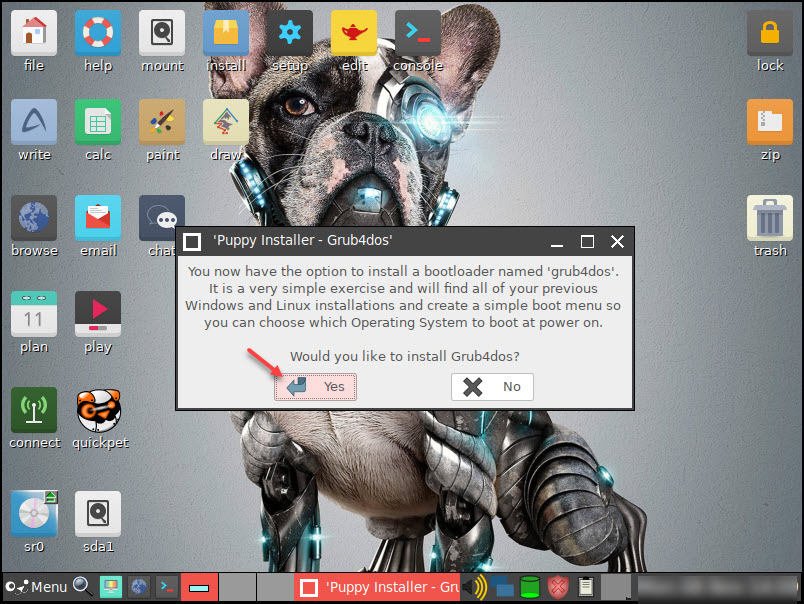
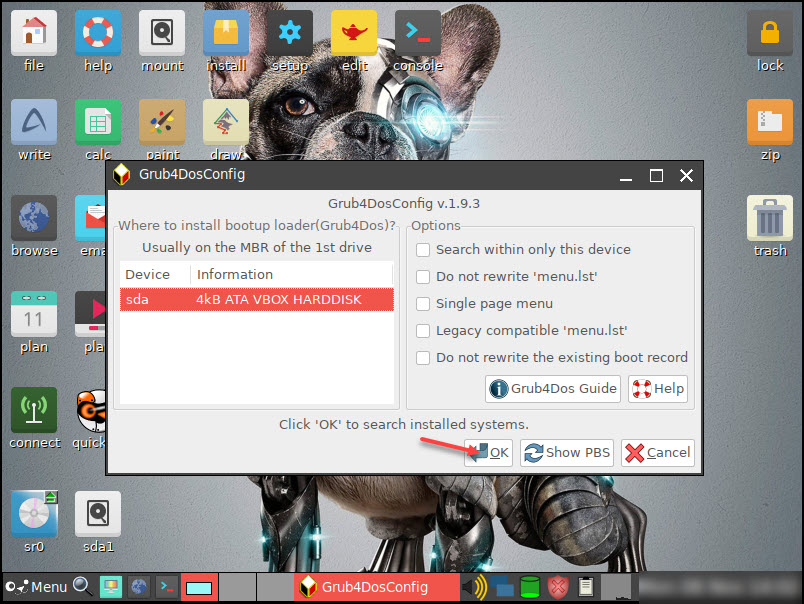
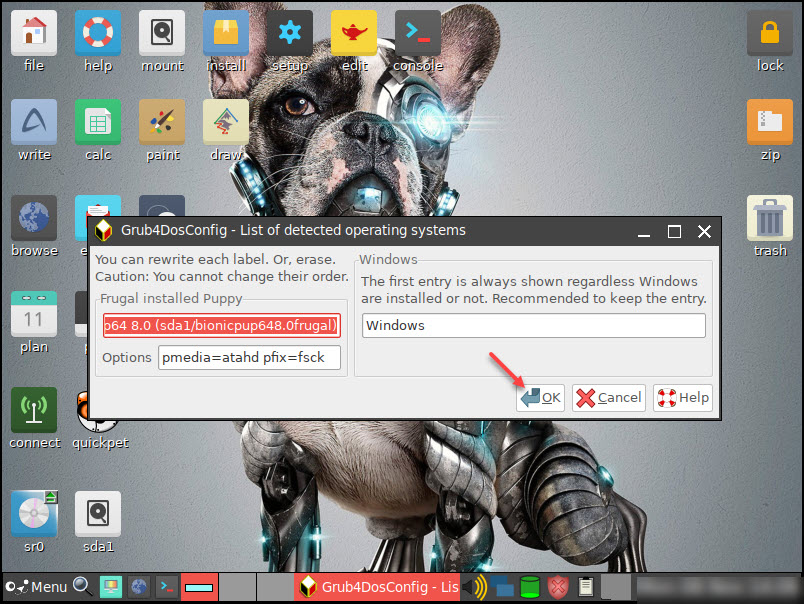
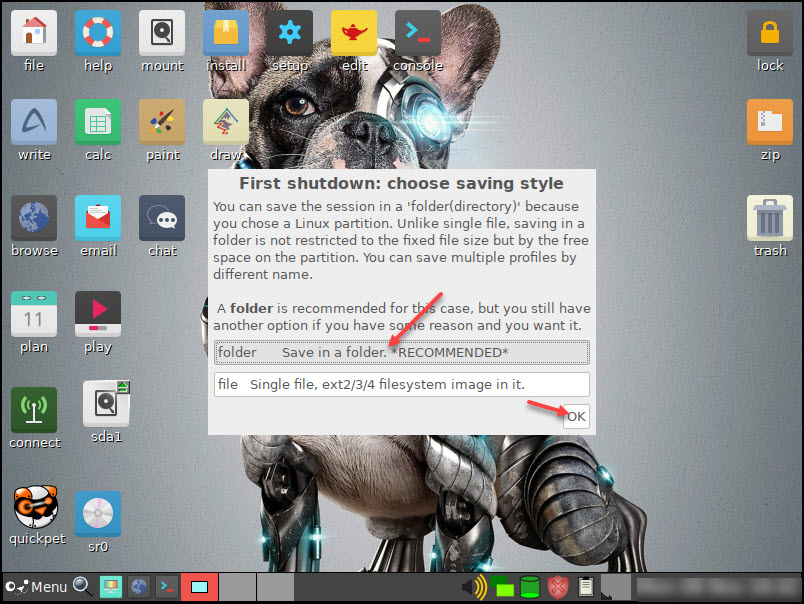
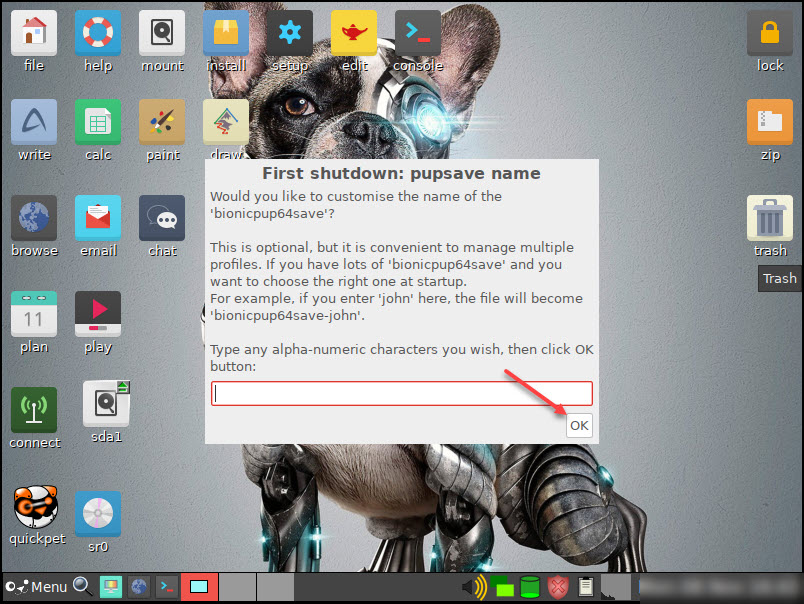
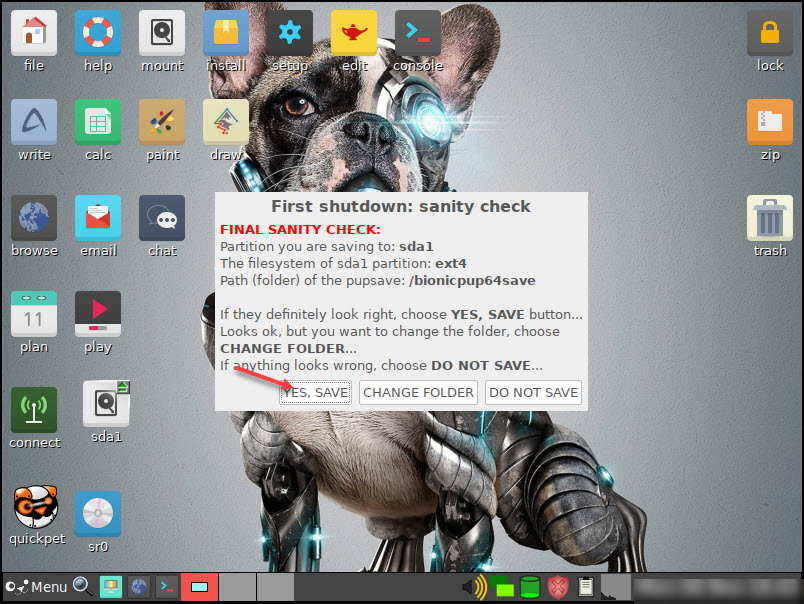
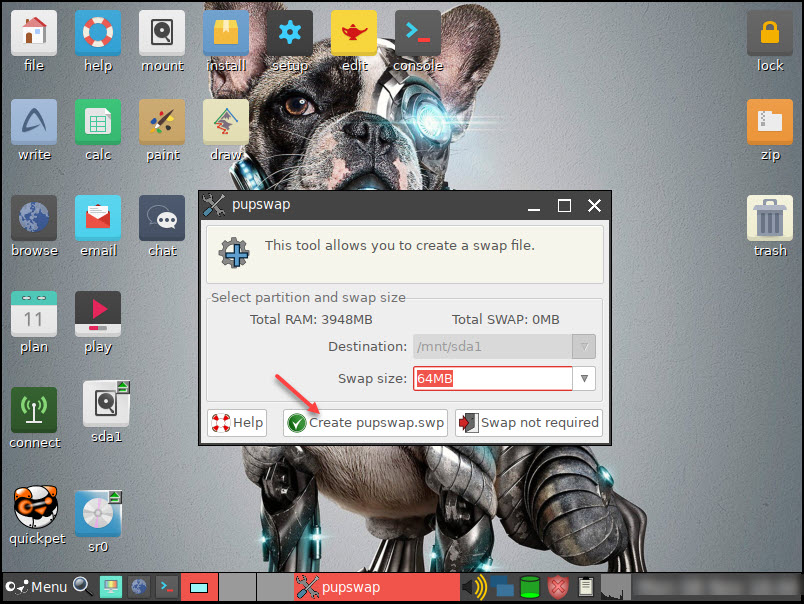
Note: This tutorial has been split into four parts / posts to comply with forum image number restrictions. At the end of each post, simply move on to the next one to continue.
I run Puppy Linux FossaPup64 not as a Live CD but as a permanent frugal install that would save its state on each exit or reboot within an Oracle VM VirtualMachine. I had trouble finding a walkthrough that would show me how to do it, despite many searches on the Web and watching various YouTube videos.
This walkthrough has been created to assist others new to Puppy Linux that may find themselves in a similar position while using BionicPup64 8.0 as an example. Snapshots of every step, as they were done, are included. Other current Puppy builds will be very similar.
It’s a great way to have a permanent Puppy Linux installation on hand.
Pre-requisites:
Windows 10 Host
Oracle VM VirtualBox Version 6.1
A downloaded copy of BionicPut64 8.0 from this link
Let’s get on with it…
Install Puppy Linux to an Oracle VirtualBox machine as a permanent install
Just like when installing any other OS to VirtualBox, we need to create an initial Virtual Machine (VM) template for it.
Step 1. Open VM VirtualBox Manager and click the New icon

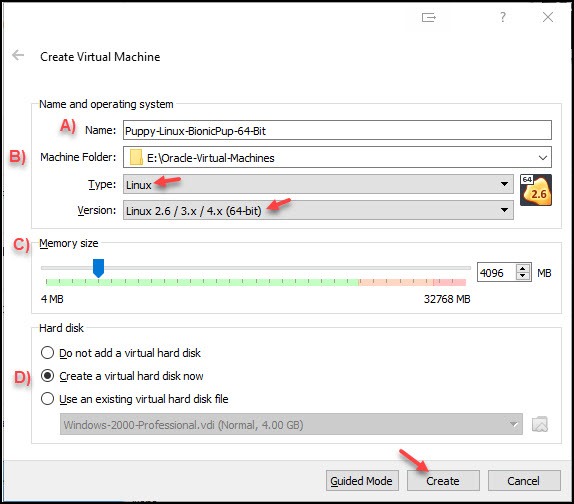
Step 2. Start filling out the “Name and operating system details”
A ) Specify the name of your VM. (Puppy-Linux-BionicPup-64-Bit in this example)
B ) Choose an appropriate location on Windows 10 where VM will be saved
C ) Specify the amount of RAM you’re willing to dedicate to the VM. The default of 1GB (or even less) will be fine, but since I have plenty to spare, I’ve given mine 4GB of dedicated RAM
D ) Select “Create a virtual hard disk now” and then click the Create button
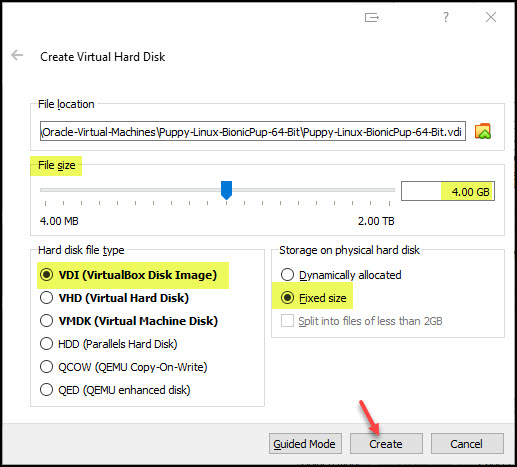
Step 3. Specify the settings of the VirtualBox Disk Image (VDI) - though it’s possible to use a Dynamically allocated VDI, I prefer to use a fixed size, so below, I’m going to specify a 4GB fixed sized VDI disk to install Bionic Pup to. Change that size to suit yourself.
Once you’re happy with your settings, click the Create button. Your initial VM template will now be created.
Step 4. Back on the VirtualBox Manager window, time to adjust a few settings to best suit the Bionic Pup install. You could do this later, but I like to get it all out of the way now. Click the Settings button

Step 5. I suggest changing the following settings for best performance.
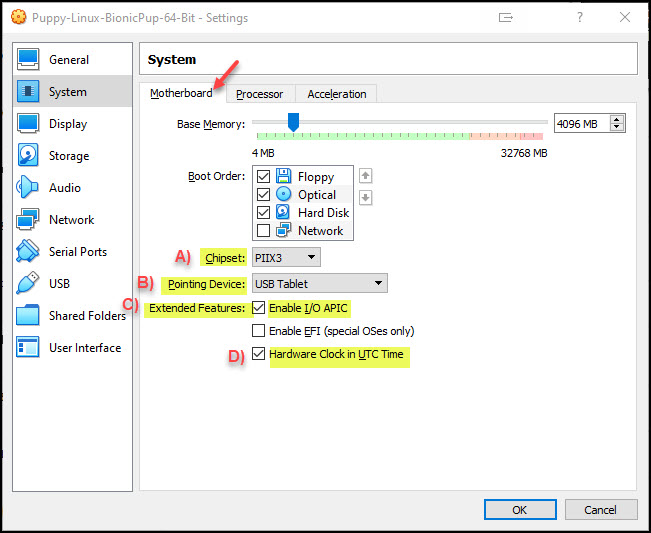
System > Motherboard
A ) Chipset: PIIX 3
B ) Pointing Device: USB Tablet (or PS2/Mouse if that’s what you have)
C ) Extended Features: Enable I/O APIC
D ) Hardware Clock in UTC Time (This is optional)
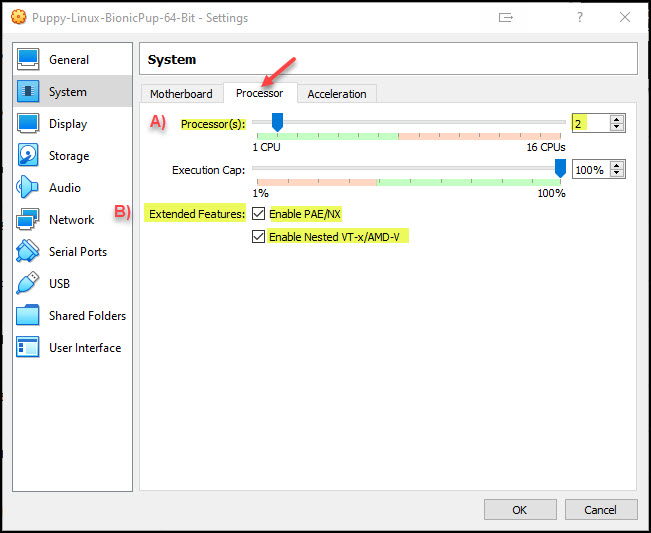
System > Processor
A ) Processor(s): 2 (or more) depending on how many cores your Hosts processor has. If using an older generation CPU with Windows 10, leaving this to 1 processor will be fine
B ) Extended Features: Enable PAE/NX and Nested VT-x/AMD-V
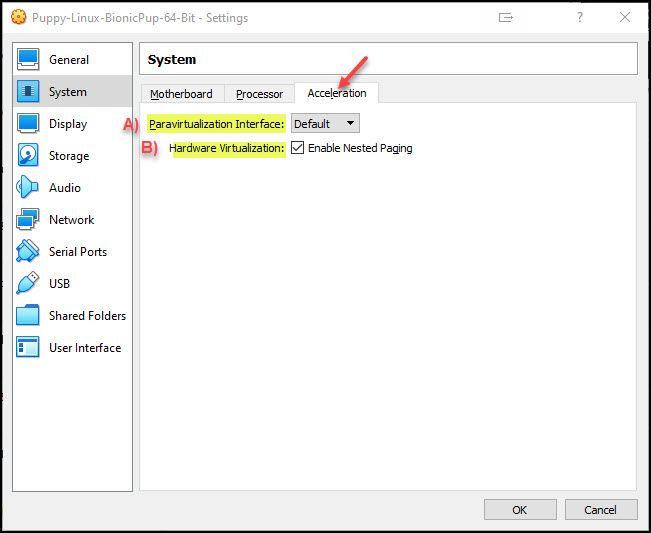
System > Acceleration
A ) Paravirtualization Interface: Enabled
B ) Hardware Virtualization: Enable Nested Paging
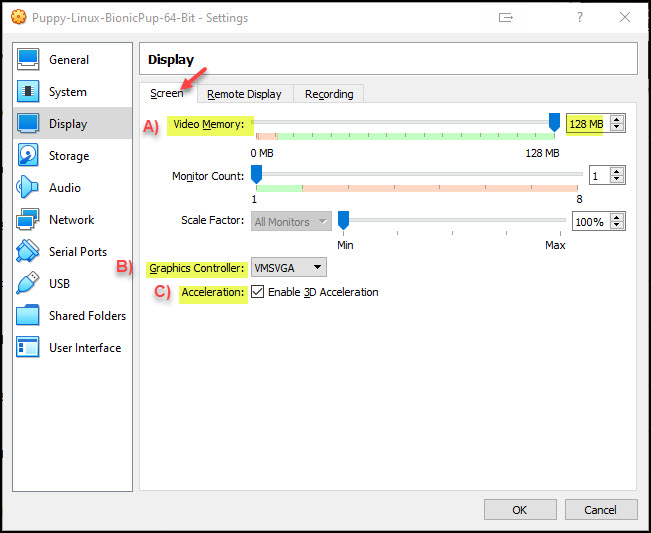
Display > Screen
A ) Video Memory: 128 MB
B ) Graphics Controller: VMSVGA
C ) Acceleration: Enable 3D Acceleration
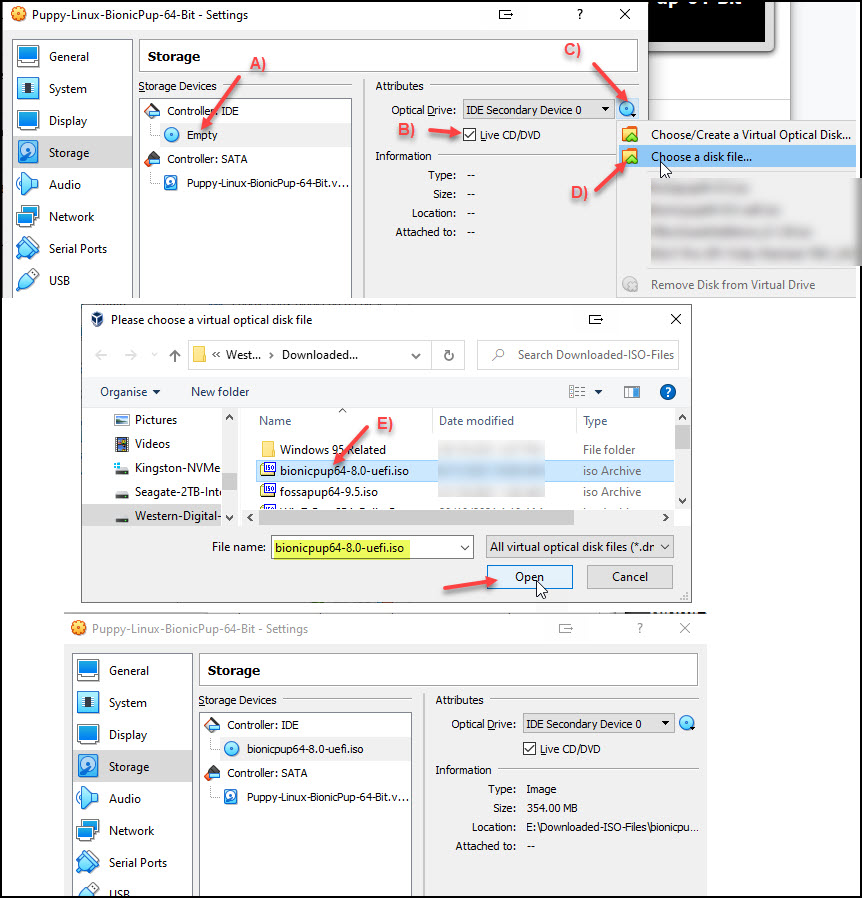
Storage > Controller IDE
This tells VirtualBox to load your downloaded bionicpup64-8.0-uefi.iso file as a Live CD that we’ll be booting with and using to permanently install Puppy later
A ) Click the Empty DVD icon
B ) Check the Live CD/DVD option
C ) Click the Choose a virtual disk icon
D ) Select Choose a disk file...
E ) Browse to where you saved your Puppy ISO and select it, then click Open
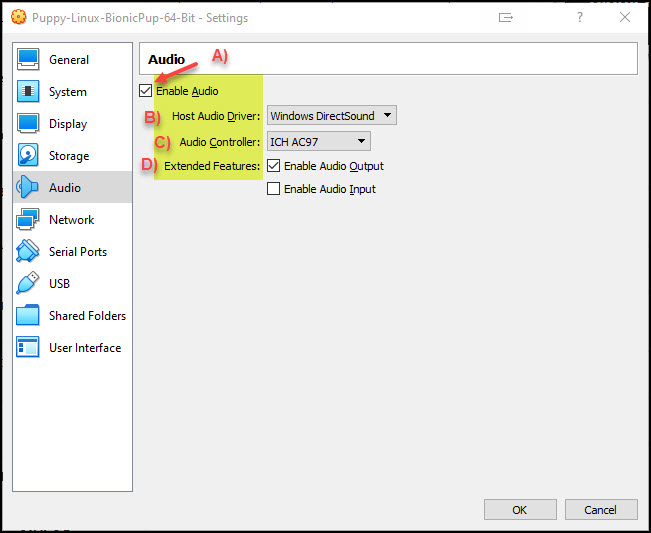
Audio
A ) Check Enable Audio
B ) Host Audio Driver: Windows DirectSound
C ) Audio Controller: ICH AC97
D ) Extended Features: Check Enable Audio Output (You can also enable Audio Input as well if you’re that way inclined)
Network
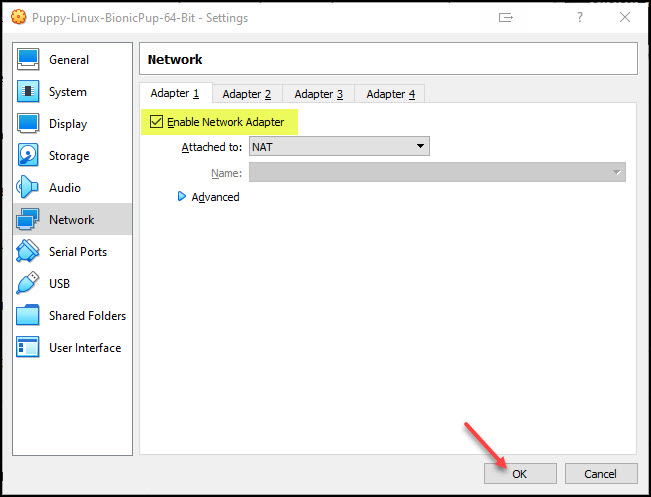
Finally, ensure your Network Adapter is enabled and attached to NAT (it should be by default) and then click the OK button to exit out of settings
Running BionicPup64 8.0 Linux for the first time
Step 6. Now that you’ve set your VM to optimal defaults, click the Start button to Boot the VM

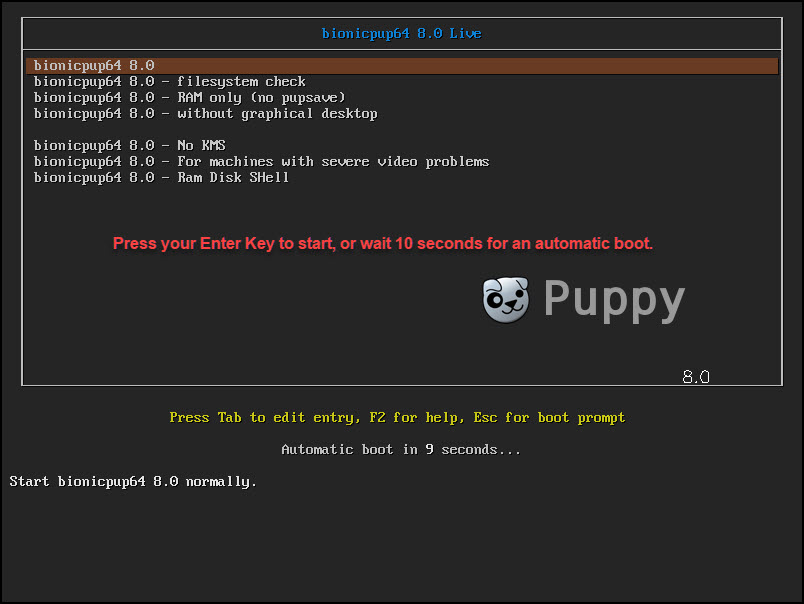
Step 7. The virtual machine boots to the following screen. Either wait 10 seconds for the boot to automatically continue, or press your Enter key
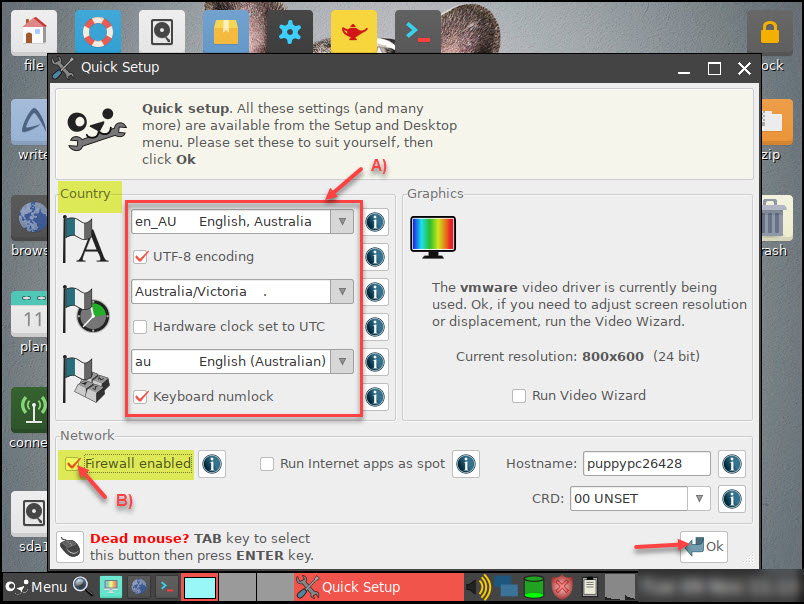
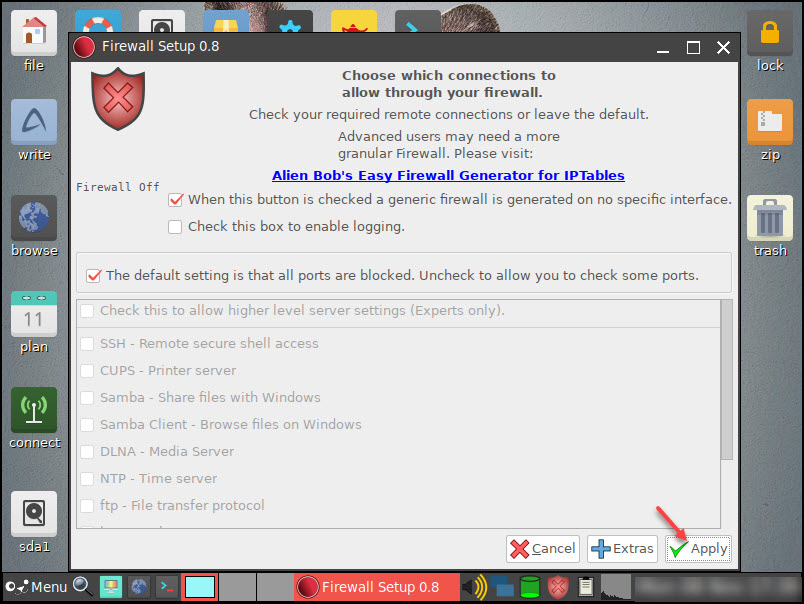
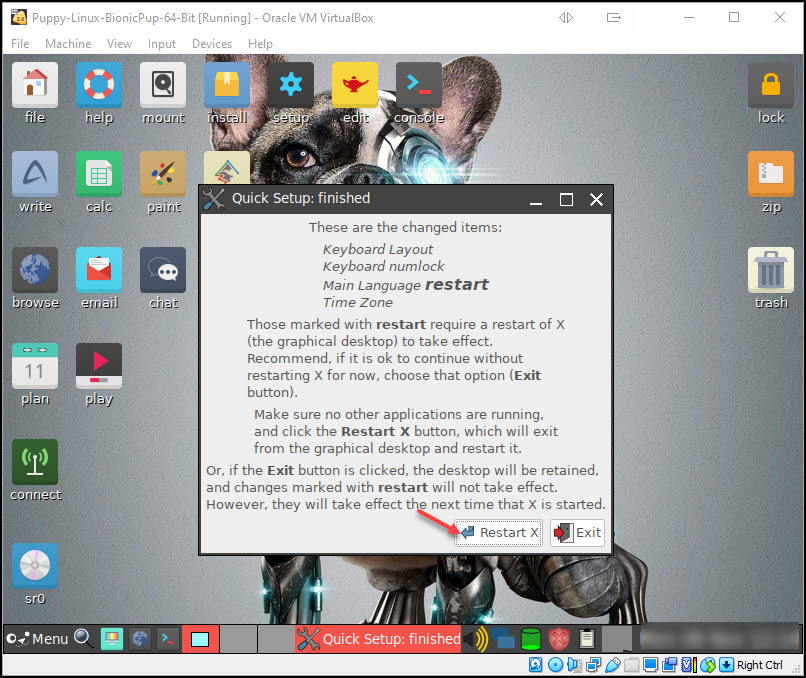
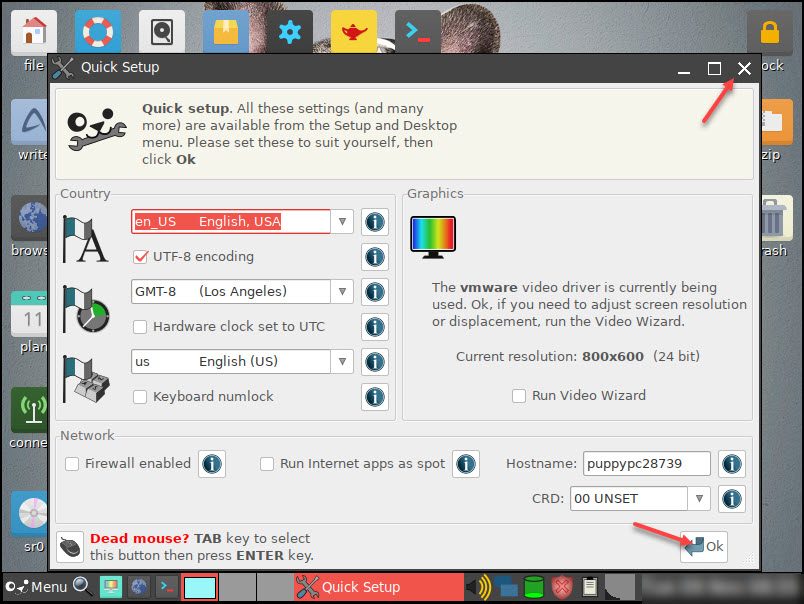
Puppy will boot into the Quick Setup screen as shown below. You can change these to suit yourself if you want to, but as we’re working on Live Boot at the moment, any changes will be lost so just click the OK button to continue.
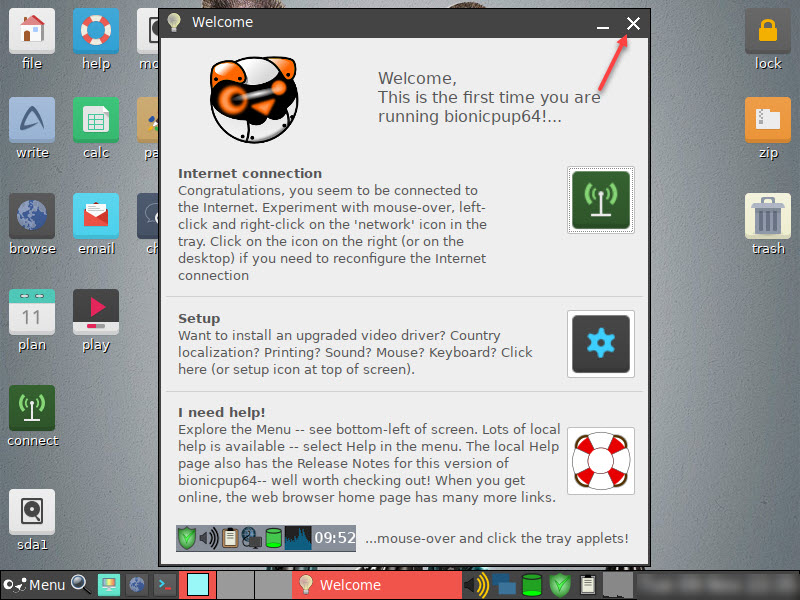
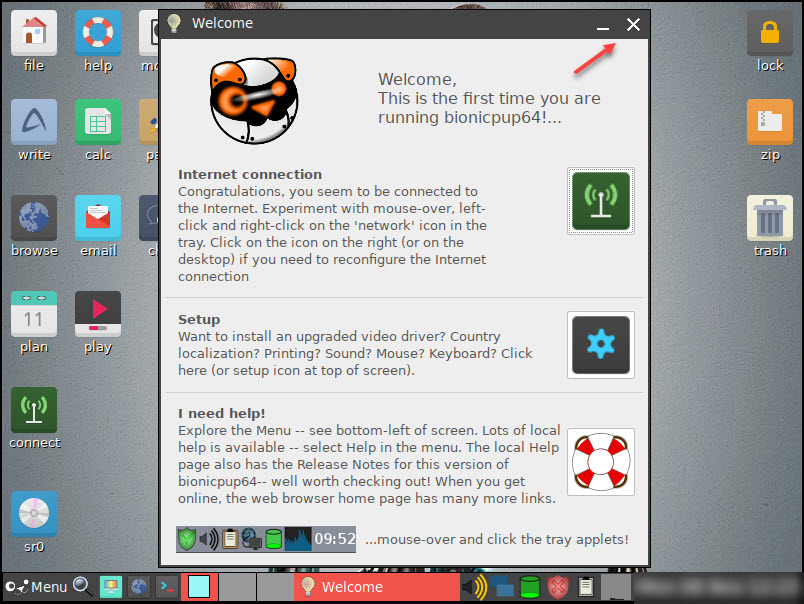
Step 8. Close the Welcome screen and continue to Step 9.
Preparing your VDI Partition
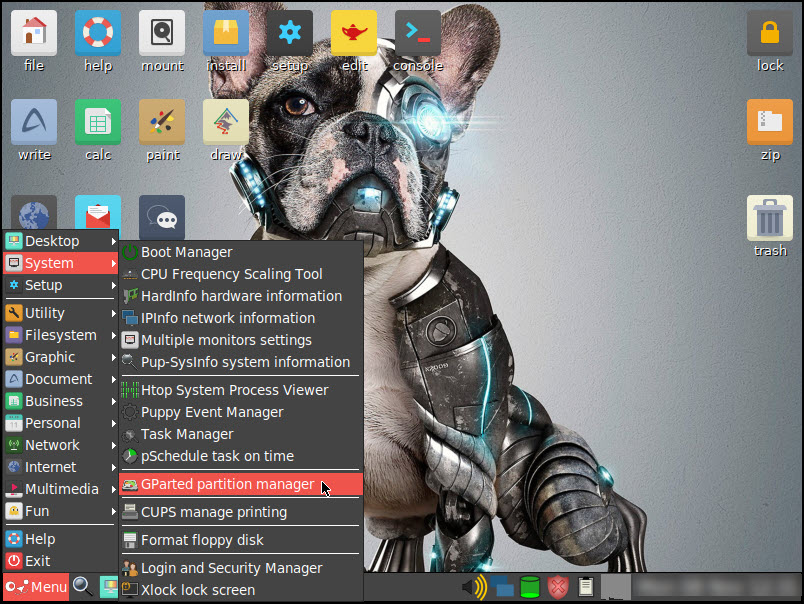
Step 9. Time to prepare the virtual disk image you created earlier for a permanent install of BionicPup64 on it.
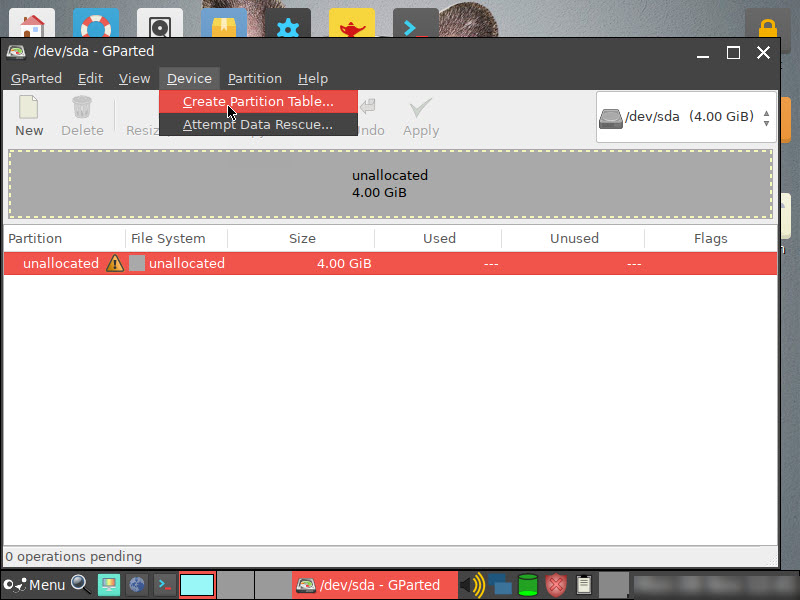
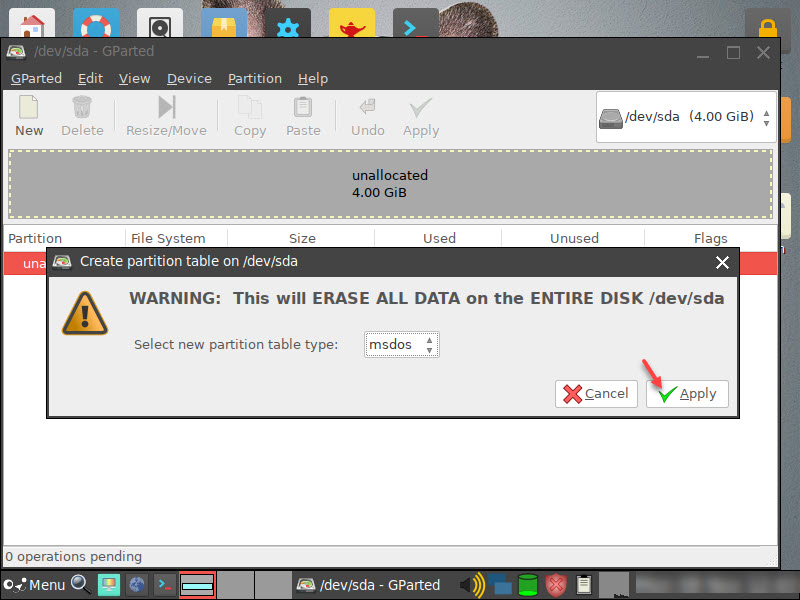
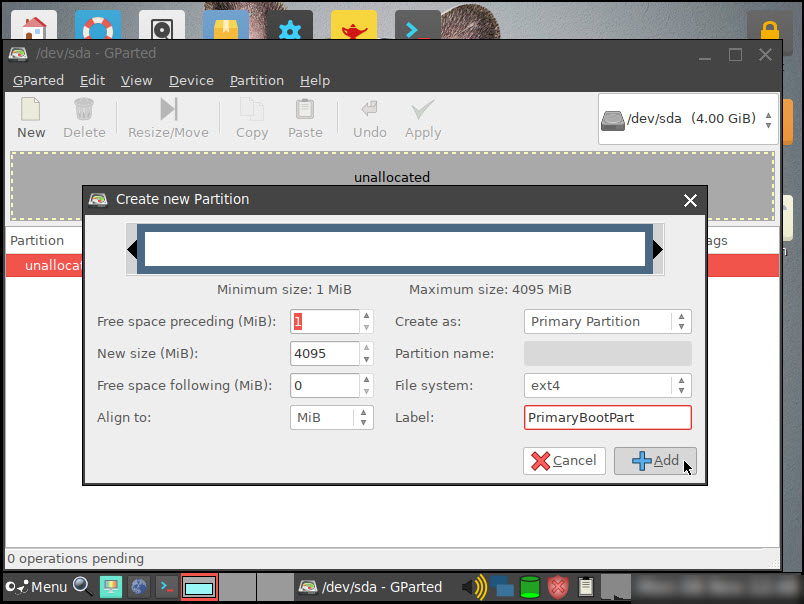
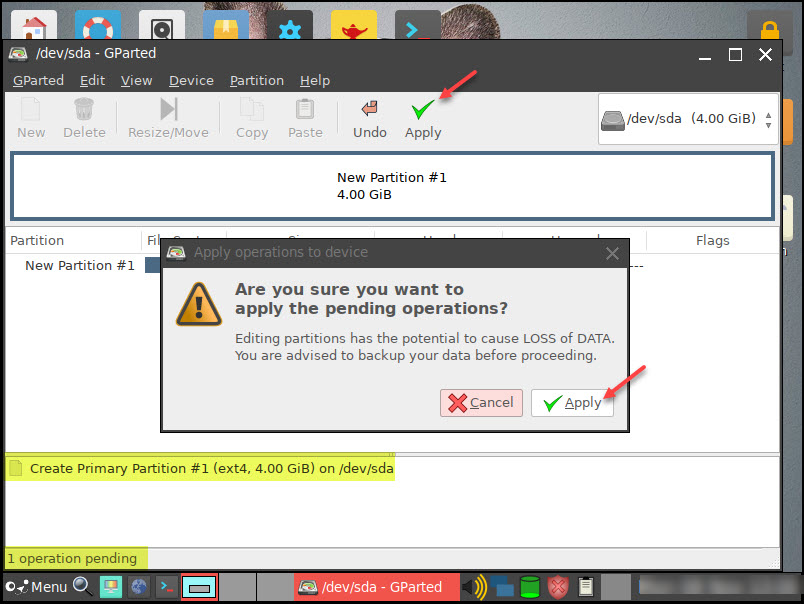
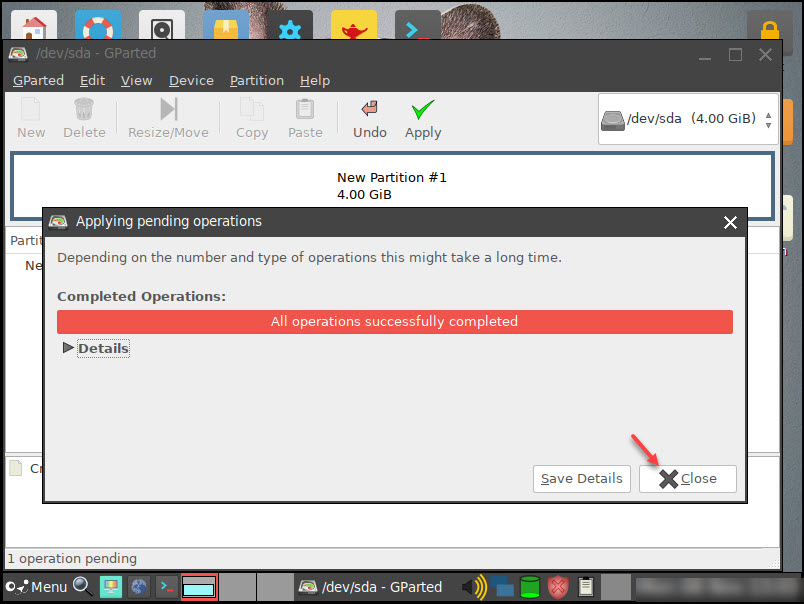
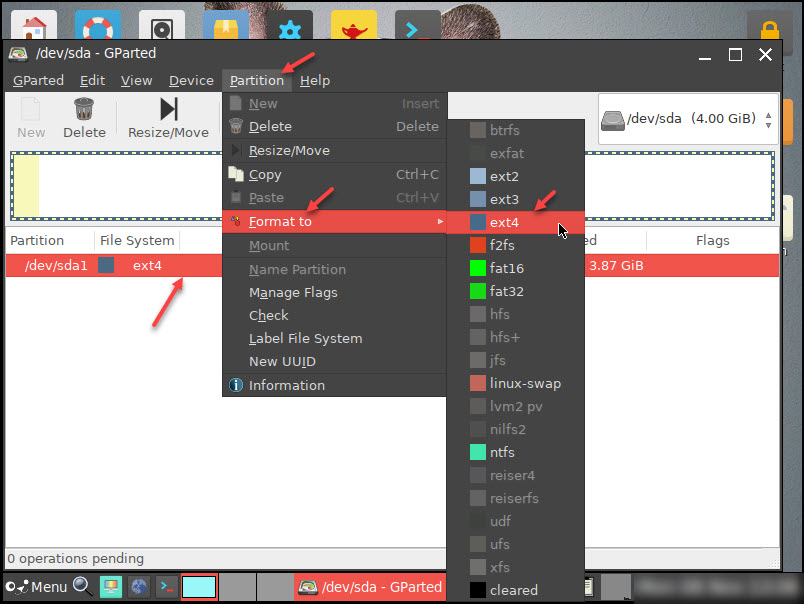
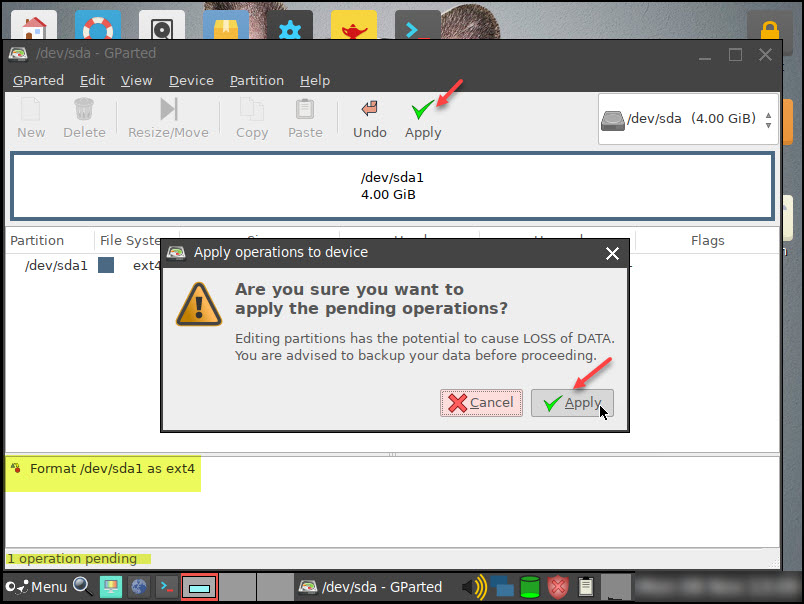
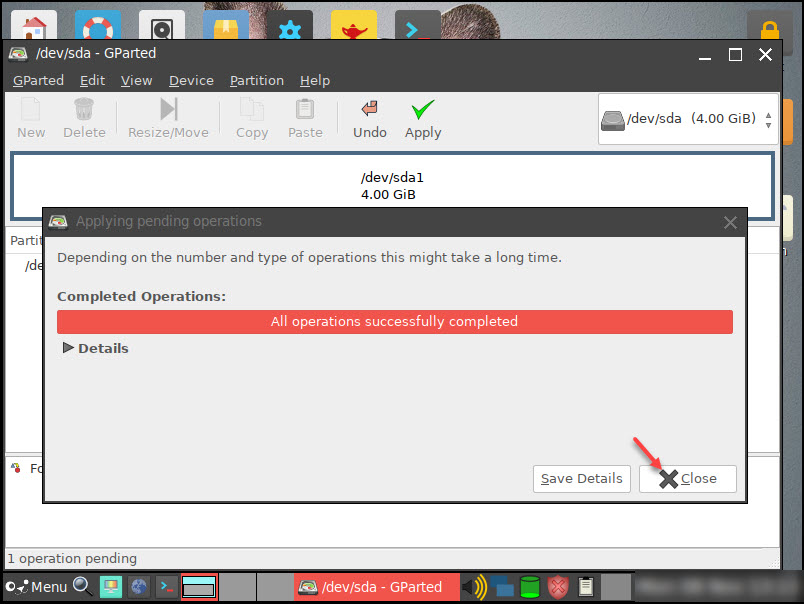
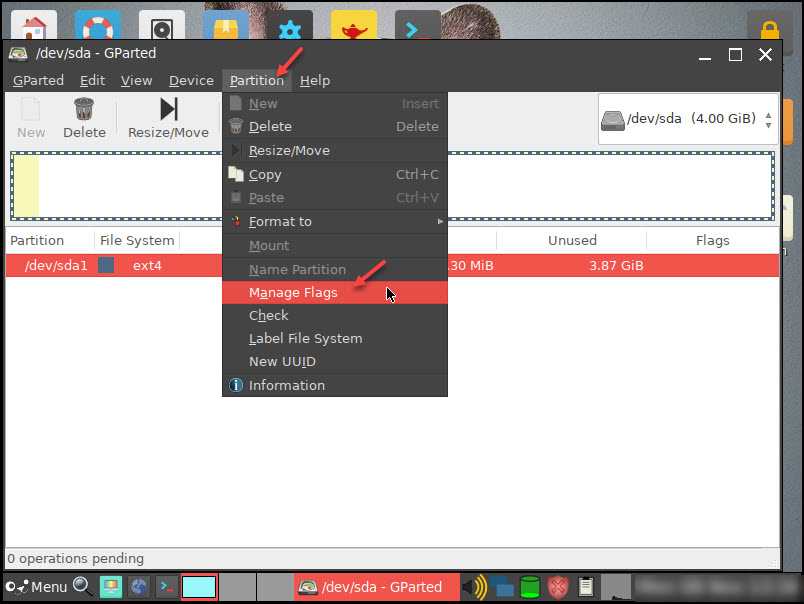
Click Menu > System > GParted partition manager
Step 10. Select sda internal drive -- ATA VBOX HARDDISK and click the OK button

Continued in next post...


 Back to top
