How to create a floppy boot disk in Windows
Lawrence Abrams
- August 30, 2005
- Read 253,562 times
Table of Contents
What is a boot disk and why do I need one?
A boot disk is a floppy or a CD that you can use to boot your computer into a state in which you can use it to fix a problem. There will be times that your computer may not boot up properly and thus you can not access files or attempt fixes that you are asked to do. When situations like this occur, having a boot disk is necessary as you will be able to access files and attempt fixes that may allow you to make your computer operational again.
With today's current versions of Windows, you will need a working version of Windows to make a boot disk on your own. With that said, it is a good thing to have a boot disk pre made and ready in case there is a problem with starting Windows in the future. .
In order to make a boot disk you will need the following:
- A blank floppy (or a used floppy that can be erased)
- A floppy drive
- A working version of an operating system
To make a boot disk follow these steps:
1. Below is a list of boot disk creators created by BootDisk.com for various versions of windows. Click on the link that corresponds to the operating system installed on the computer that will be booted by the boot disk.
- Windows 95 Version B Boot Disk [Mirror]
- Windows 98 Second Edition Boot Disk [Mirror]
- Windows ME Boot Disk
- Windows XP Boot Disk
2. Save the selected boot disk to your desktop when your browser prompts you where to save it to. When the file has completed downloading you will see an icon similar to the one below with a name that corresponds to the operating system you chose for the boot disk.
![]() .
.
3. Double-click on the icon to start the boot disk creation process and you will be greeted with a screen similar to the one below.

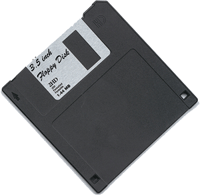
4. Insert a floppy disk into your floppy drive. For those who are unsure what a floppy disk is, it looks like this:

A Floppy Disk
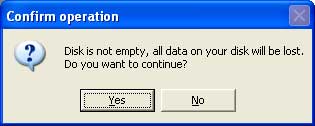
5. Once a floppy has been inserted, press the OK button. If the inserted floppy contains data you will see a confirmation screen asking if you want the process to continue and erase the disk as shown below.

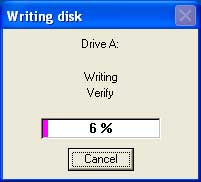
If you want the disk to be overwritten, press the Yes button, otherwise press the No button and insert a different disk. Once a disk has been inserted with no data or you confirm that it should be overwritten, the creation process will start and look similar to the image below.

When the program is done writing to the disk, it will close on its own.
6. Now that the boot disk has been completed you should remove the disk, label it as a boot disk, and store it in a safe location for when it is needed.
If at any time during this process you get an error stating that there is something wrong with the disk, remove the current floppy and insert a new one, as it is possible for floppies to get damaged over time by accidentally being bent or by dust getting inside them.
How to use a boot disk
To use the floppy, simply insert the boot disk into your computer's floppy drive and start or reboot your computer.When your computer starts, it will detect the floppy and attempt to boot off it. As it is a bootable floppy, your computer will start in DOS mode and allow you to access your files and data. Remember, though, to remove this floppy when you want your computer to boot up normally otherwise every time you turn your computer, it will boot off of the floppy.
For an introduction to some of the commands you type in DOS, you can read our tutorial here:
Introduction to the Windows Command Prompt
As always, if you have any questions, please feel free to ask them in the computer help forums.
--
Lawrence Abrams
Bleeping Computer Windows Basics
BleepingComputer.com: Computer Help & Tutorials for the beginning computer user.


